


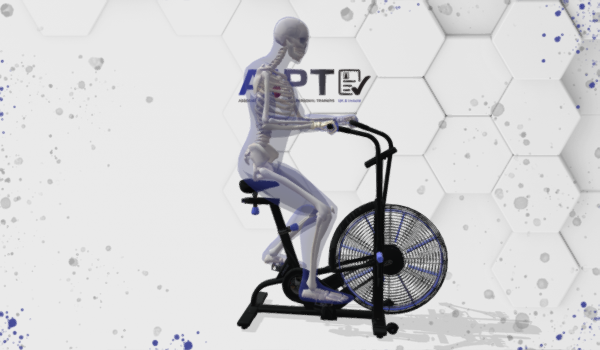
1. Adjust the seat height and handlebar position to fit your body comfortably.
2. Sit on the bike and place your feet on the pedals. Hold onto the handlebars with a comfortable grip.
3. Begin pedaling the bike by pushing down with your feet and pulling up with your arms. The harder and faster you pedal, the more resistance you'll experience from the air fan.
4. To increase the intensity of your workout, pedal faster or increase the resistance level on the bike.
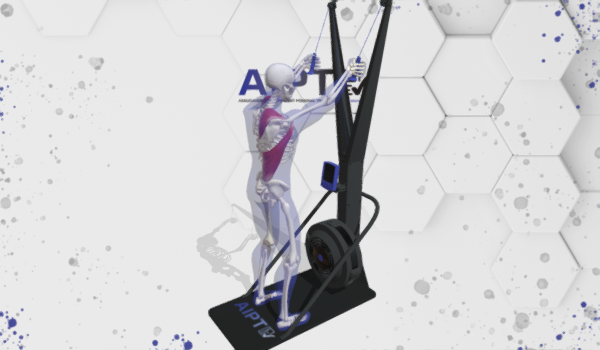
Here are the 4 steps to use a Ski Erg machine:
1. Stand in Front of the Ski Erg: Position yourself in front of the Ski Erg machine, ensuring your feet are hip-width apart.
2. Hold the Handles: Grasp the handles of the Ski Erg with both hands, and maintain an overhand grip (palms facing down). Your arms should be extended, and your body should be in an upright position.
3. Begin the Skiing Motion: Initiate the skiing motion by pushing the handles downward while simultaneously bending at your hips and knees. As you push down with one hand, the other hand should be rising upward.
4. Alternate Arms and Legs: Continue the skiing motion by alternating the pushing and pulling of the handles with your arms while bending and extending your legs. Imagine you're cross-country skiing, and maintain a fluid, rhythmic motion.
The Ski Erg is an excellent cardiovascular exercise that engages both the upper and lower body. Make sure to use proper form, maintain a steady pace, and adjust the resistance level as needed to match your fitness goals and abilities.
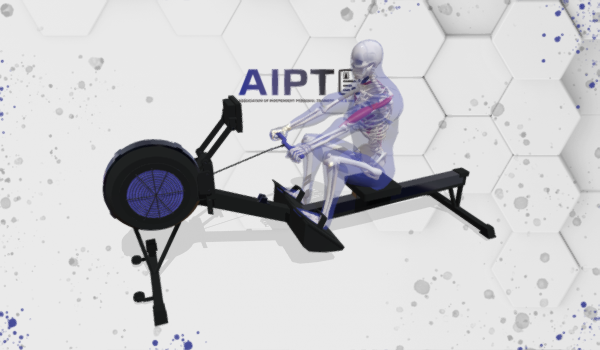
Here are the 4 steps to use a Concept 2 Rowing Machine:
1. Set Up: Adjust the foot straps on the rowing machine so that they securely hold your feet in place. Adjust the resistance level to your preference, with lower settings for less resistance and higher settings for more resistance.
2. Start Position: Sit on the rowing machine's seat, ensuring your feet are securely strapped in. Grab the handlebar with an overhand grip, keeping your arms fully extended and your back straight. Your knees should be bent, and your shins should be vertical.
3. Rowing Stroke:
a. The Catch: Begin the rowing stroke by pushing off with your legs, extending them fully while keeping your arms straight. This is called "the catch" position.
b. The Drive: From the catch position, start bending your knees while simultaneously leaning back slightly. This movement engages your leg and back muscles.
c. The Finish: As your legs straighten and your torso leans back, pull the handlebar toward your lower ribs. This is known as ""the finish"" position.
d. The Recovery: Reverse the process by extending your arms, leaning forward at the hips, and then bending your knees to slide back to the catch position.
4. Row Continuously: Repeat the rowing stroke, moving smoothly between the catch, drive, finish, and recovery positions. Maintain a steady pace and rhythm, focusing on proper technique and using your legs, core, and arms in coordination.
The Concept 2 Rowing Machine provides an excellent full-body workout, engaging your legs, core, back, and arms. It's important to use proper form to maximize the effectiveness of the exercise and minimize the risk of injury.
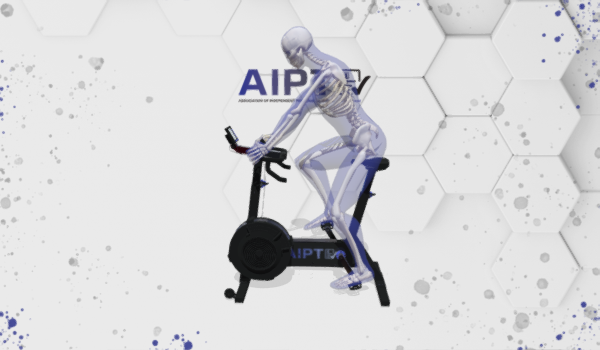
Here are the 4 steps to use a Concept 2 BikeErg:
1. Set Up: Adjust the seat height and handlebar position to your comfort. Set the desired resistance level using the damper setting.
2. Mount the BikeErg: Straddle the bike and place your feet on the pedals. Adjust the foot straps if equipped.
3. Begin Cycling: Start pedaling in a smooth and controlled motion. You can choose between various programs or simply ride at your own pace.
4. Monitor Stats: Keep an eye on the monitor for information like speed, distance, time, and resistance level. Adjust your workout intensity as desired.
The Concept 2 BikeErg is an effective cardio and lower-body workout machine. Ensure proper seat and handlebar adjustments for a comfortable ride, and monitor your progress on the display screen.

